
- Published on, Time to read
- 🕒 8 min read
Unlocking the Power of Spring: Building an Interactive Shell Application
- Authors

- Name
- Mahesh Babu
Unlocking the Power of Spring: Building an Interactive Shell Application
In the world of software development, command-line interfaces (CLIs) play a crucial role in providing powerful and flexible tools for users. Spring Framework, a popular Java-based framework, offers a comprehensive solution for building robust and scalable applications. One of its lesser-known gems is Spring Shell, a powerful library that enables developers to create interactive and command-driven applications.
In this article, we will embark on a journey to explore the process of building a Spring Shell application from scratch. We’ll dive into the key concepts and demonstrate how to leverage the flexibility and extensibility of Spring Shell to develop a command-line interface that suits your specific needs.
But that’s not all! We won’t stop at just creating a traditional command-line application. We’ll take it a step further by exploring the exciting realm of native application generation. By harnessing the power of tools like GraalVM and Spring Native, we’ll convert our Spring Shell application into a self-contained native executable, bringing performance optimizations and deployment convenience to the table.
Whether you’re a seasoned Spring developer looking to enhance your CLI toolkit or a newcomer eager to explore the potential of command-driven applications, this article will provide you with a comprehensive guide to creating a Spring Shell application and taking it to the next level of native generation.
So, let’s roll up our sleeves, fire up our IDEs, and embark on this adventure of building a Spring Shell application from scratch and generating a native executable. Let’s unlock the full potential of Spring and command-line interfaces!
LETS GET STARTED !
Lets head to https://start.spring.io/ and configure the project as shown below
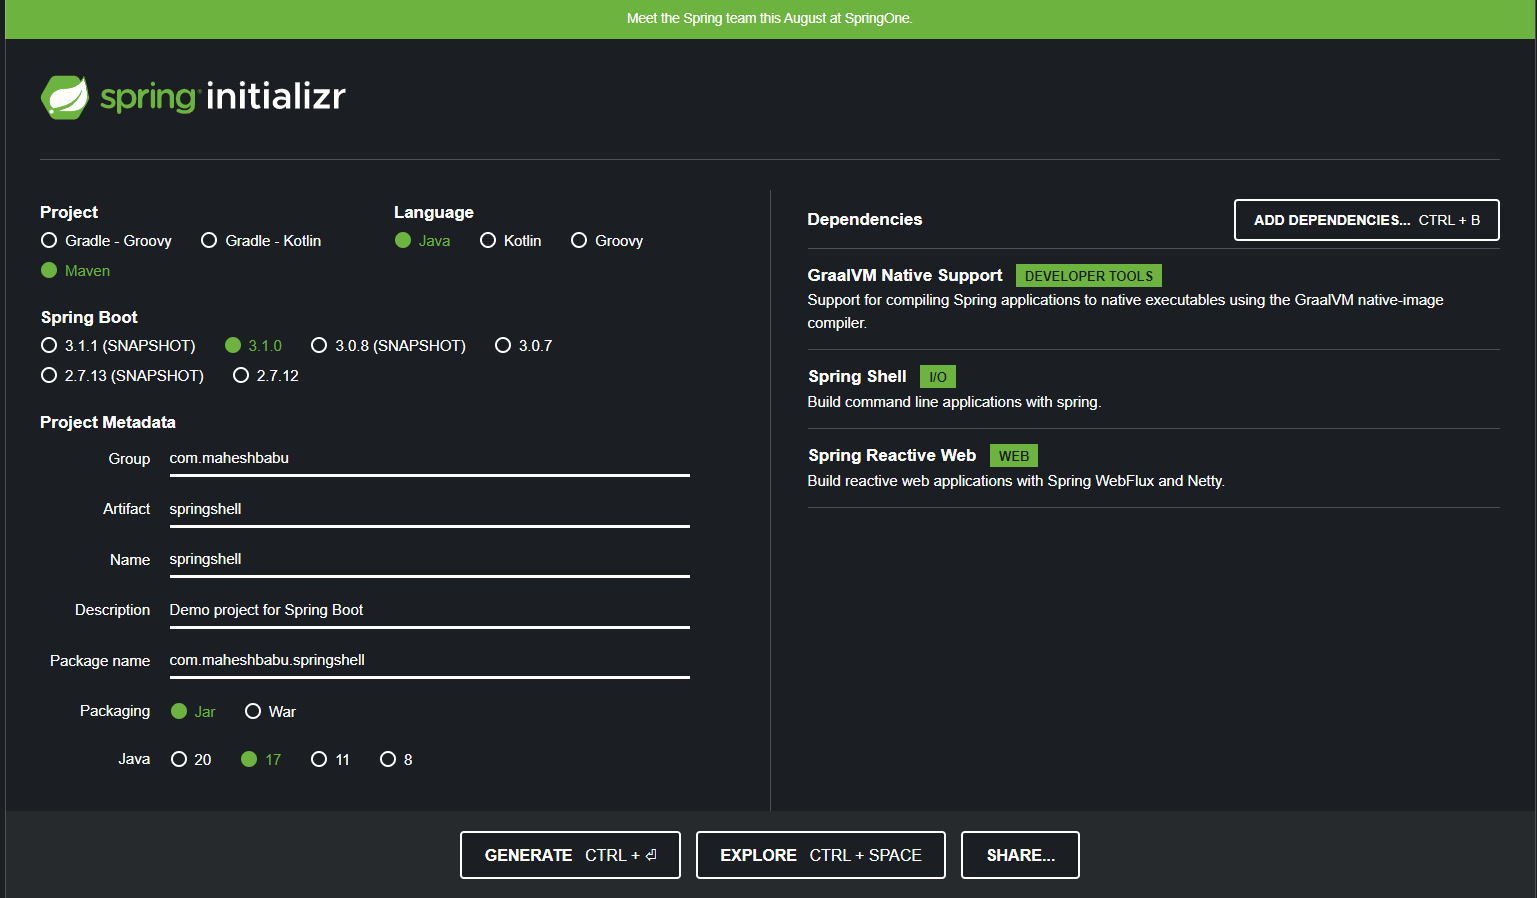
We are going to be using Java 17 for this project , The dependencies that we are goin to be using are :
Spring Shell
Spring Reactive Web
GraalVM Native Support
Now lets open the project in the ide of your choice. I am going to be using Intellij Idea.
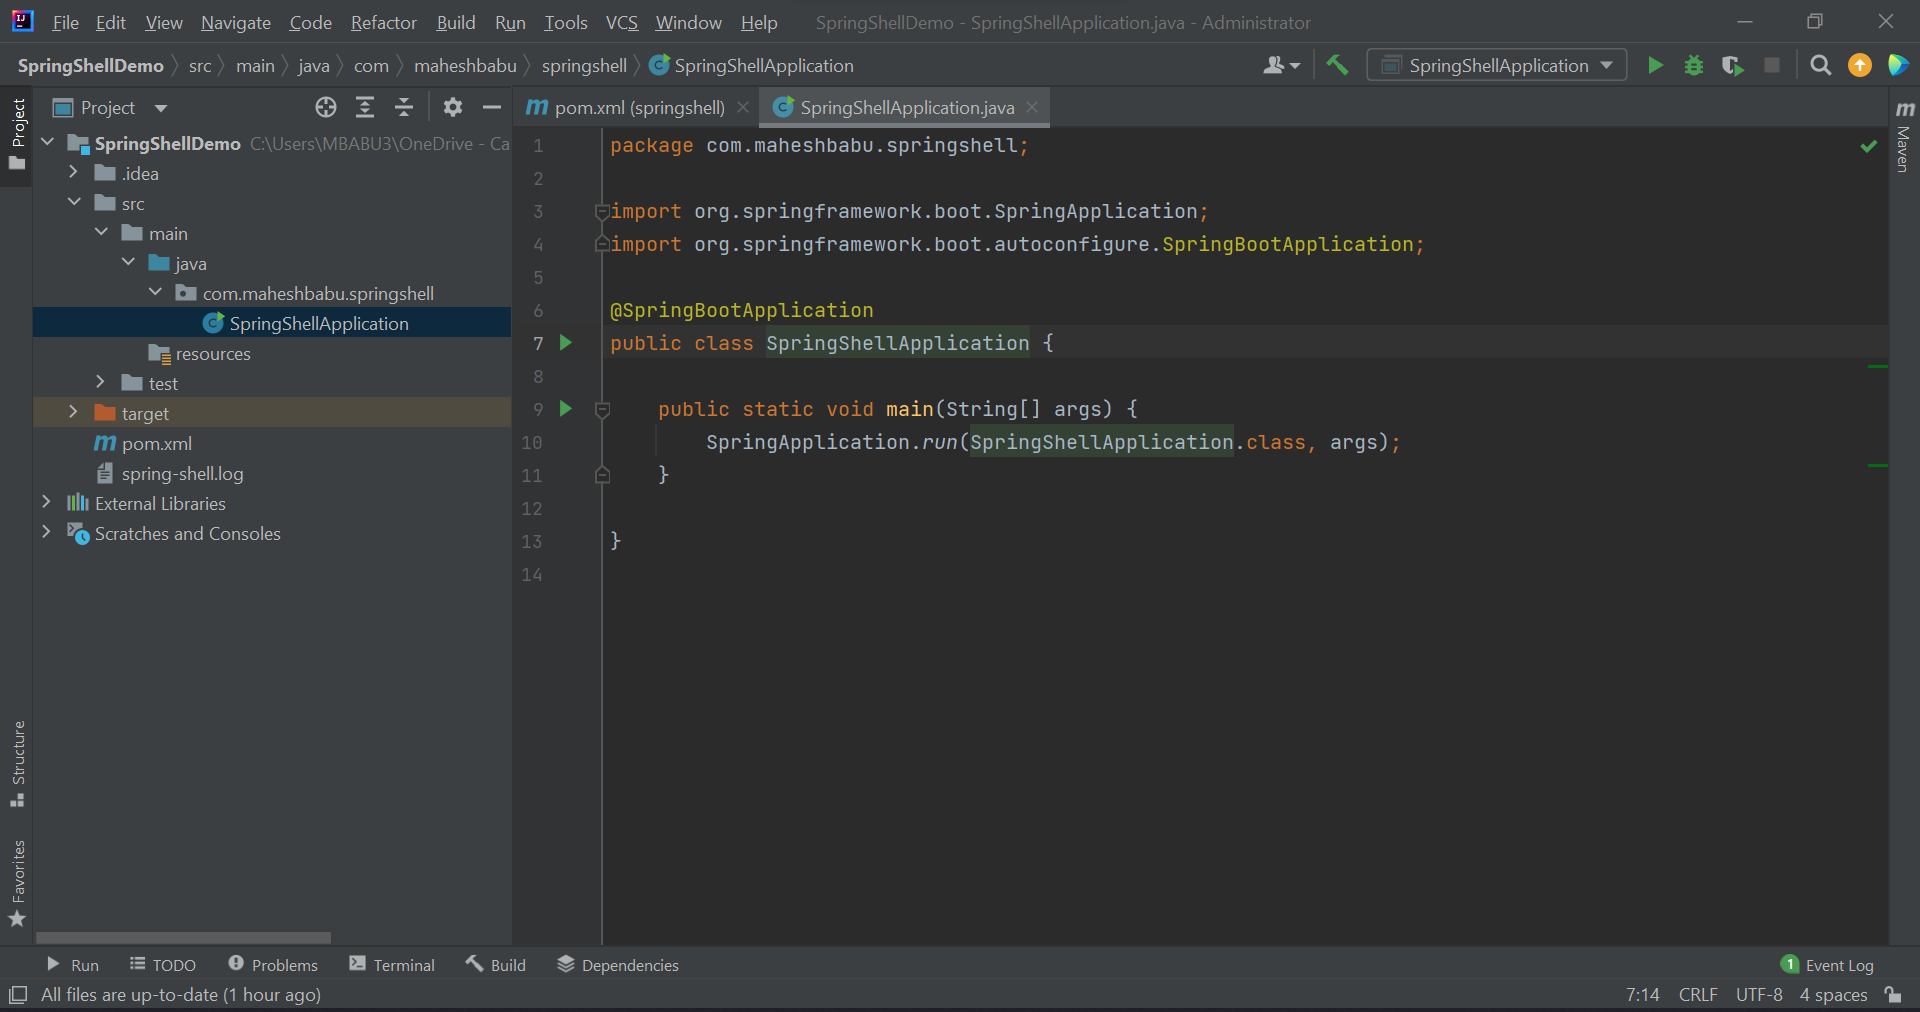
But first, let’s start by testing our application with a simple shell command, like a “Hello” command. This initial test will ensure that our environment is set up correctly, and we can validate the basic functionality of our CLI application.
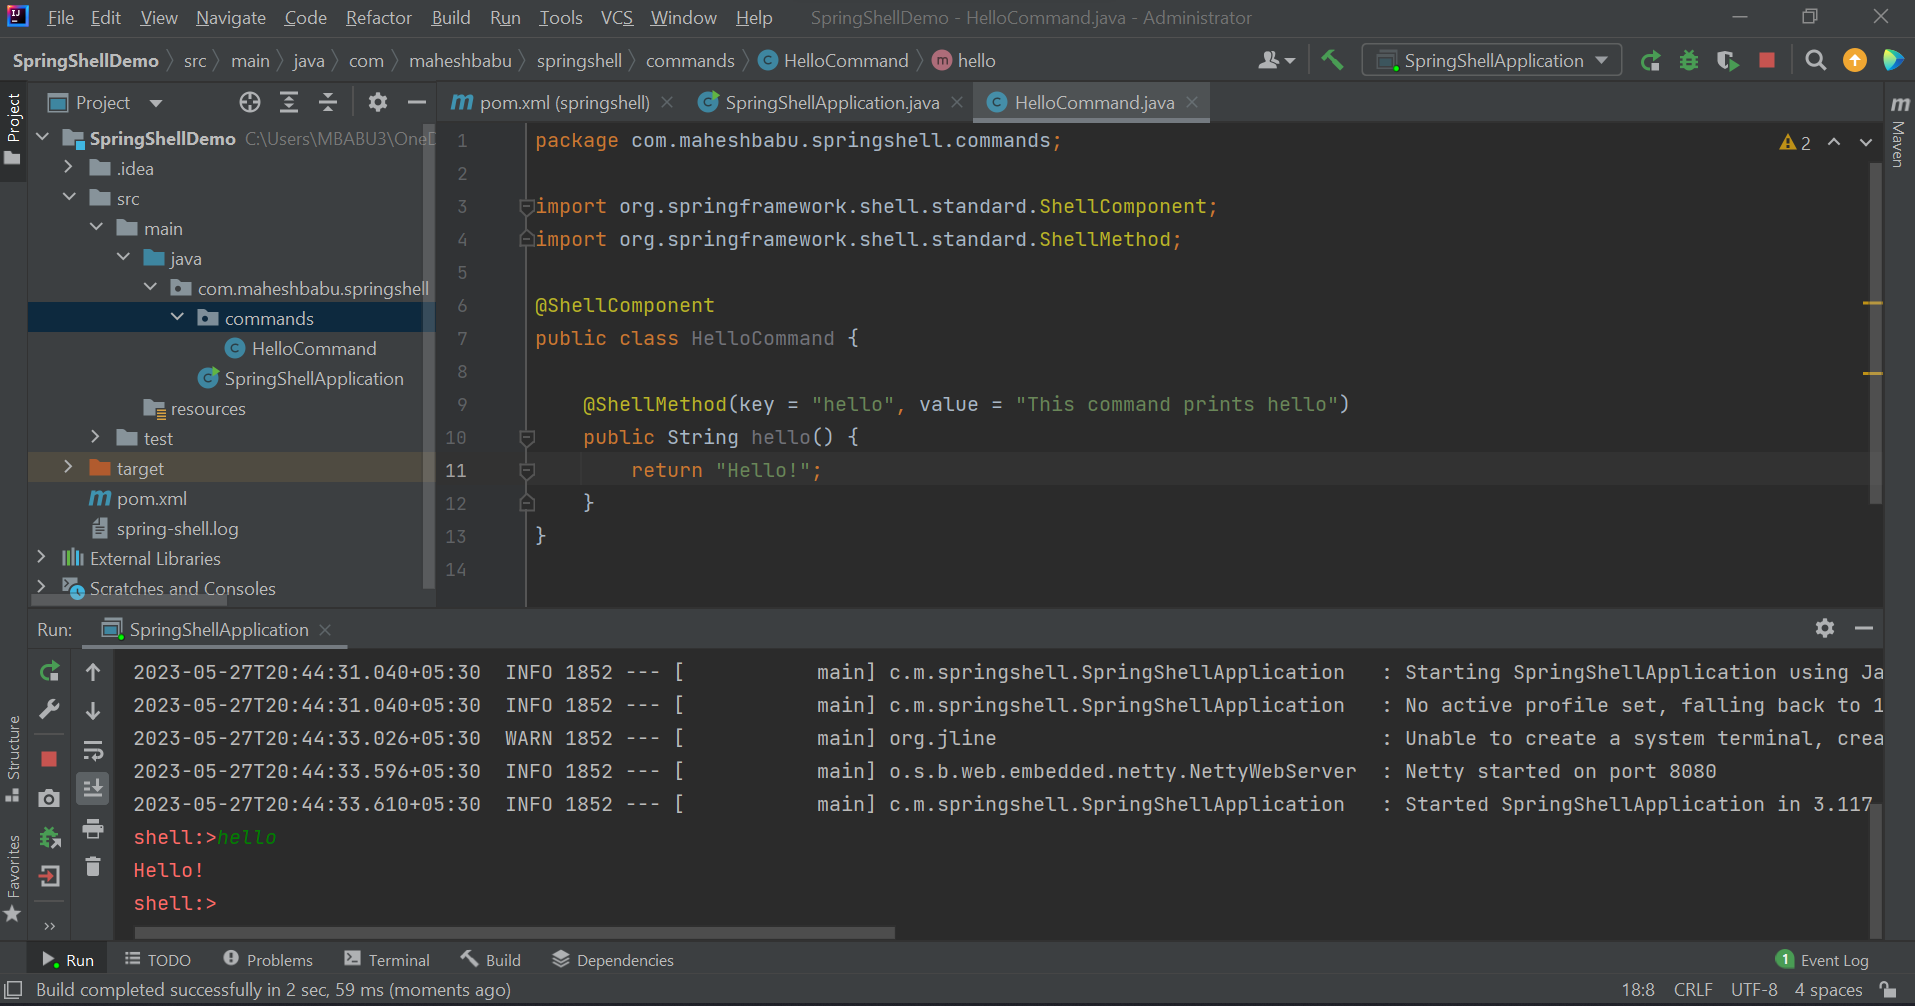
To begin, we’ll create a new package called “command” and add a file named “HelloCommand”.
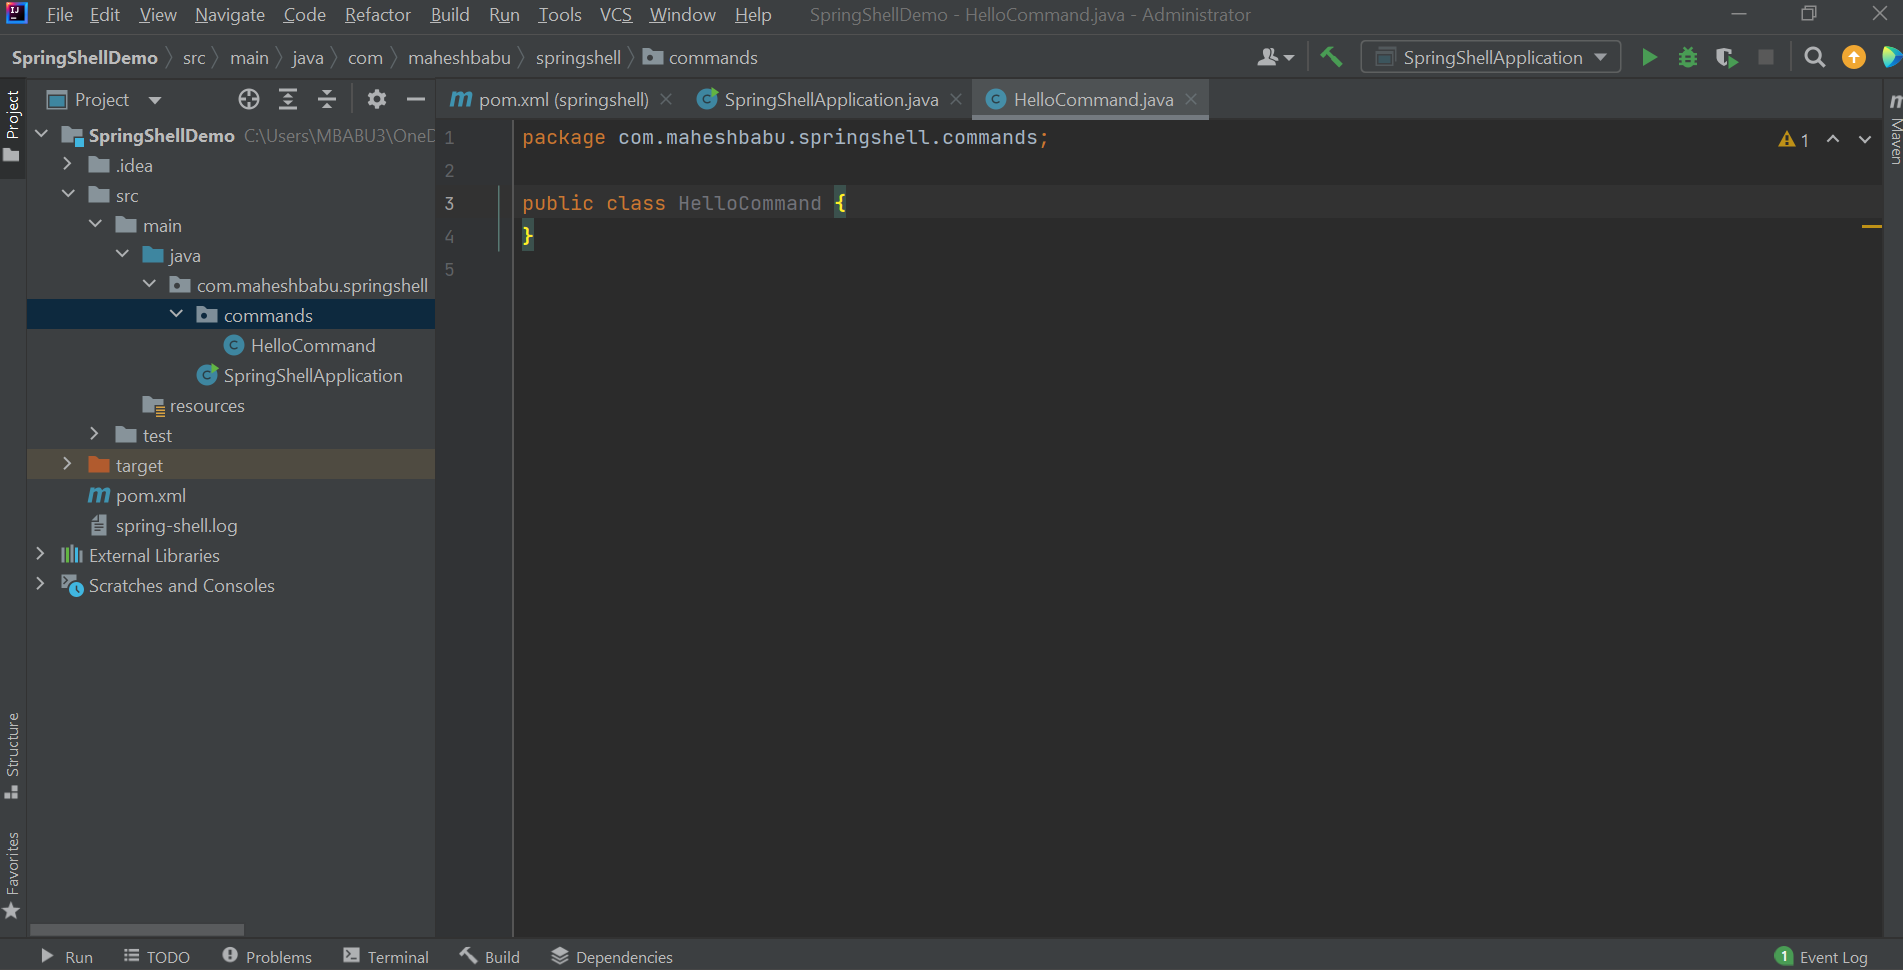
Now lets add some code.
    package com.maheshbabu.springshell.commands;

    import org.springframework.shell.standard.ShellComponent;
    import org.springframework.shell.standard.ShellMethod;
    import org.springframework.shell.standard.ShellOption;

    @ShellComponent
    public class HelloCommand {

        @ShellMethod(key = "hello", value = "This command prints hello")
        public String hello() {
            return "Hello!";
        }
    }
Here we use two annotations :
@ShellComponent : It is used to mark a class as a component within a Spring Shell application. This annotation allows you to define a class as a command component that provides multiple related commands for the command-line interface (CLI).
@ShellMethod : This annotation allows you to define methods as commands in a Spring Shell application, providing a straightforward way to expose Java functionality as executable commands within the CLI. The “key” parameter is used to specify an alternative name or alias for the command. By default, the name of the annotated method is used as the command name. However, if you want to provide an additional name or alias for the command, you can use the "key" parameter. The “value” parameter is used to provide a description or help text for the command.
Now lets go ahead a run the application !!!
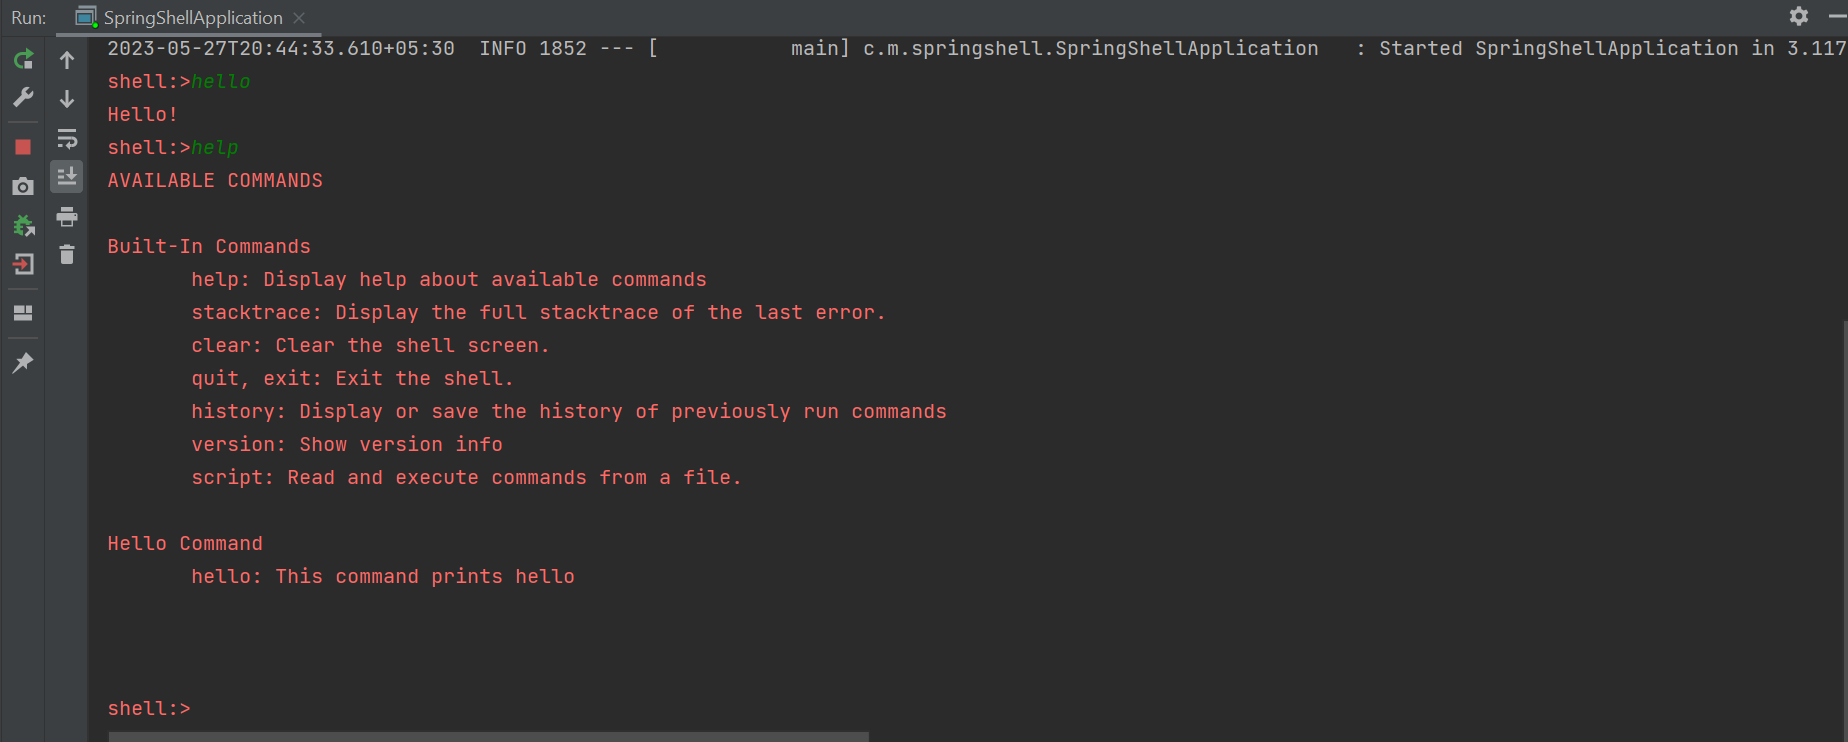
Once the application is started, it opens a shell interface. In this shell, if we enter the command “hello”, it will return the same. Additionally, there are other built-in commands available, such as “help”. Typing “help” in the shell displays a list of all available commands. Let’s try it out by entering “help” in the shell. You will see a list of both the built-in commands and the custom “help” command that we have created.
In addition to what we’ve covered so far, there’s one more thing we need to do: adding shell options. Typically, when we enter a command in the terminal, we have the option to specify additional parameters after the command itself. For example, “mkdir name” allows us to specify a directory name.
Let’s enhance our “hello” command by adding a shell option. This will enable us to provide additional parameters or customize the behavior of the “hello” command when executing it in the shell interface.
    package com.maheshbabu.springshell.commands;

    import org.springframework.shell.standard.ShellComponent;
    import org.springframework.shell.standard.ShellMethod;
    import org.springframework.shell.standard.ShellOption;

    @ShellComponent
    public class HelloCommand {

        @ShellMethod(key = "hello", value = "This command prints hello")
        public String hello(@ShellOption(defaultValue = "World") String arg) {
            return "Hello " + arg + "!";
        }
    }
Now we have introduced a new option called “args” to our “hello” command. This option allows us to pass an argument after the “hello” command and display a customized greeting, such as “Hello, name!” or a default value if no argument is provided, which is “Hello, World!”. Lets go ahead and test this.

As anticipated, when we provide a name as an argument in our command, we receive the same name back in the message. The greeting message is now personalized based on the name we provided as an argument in the command.
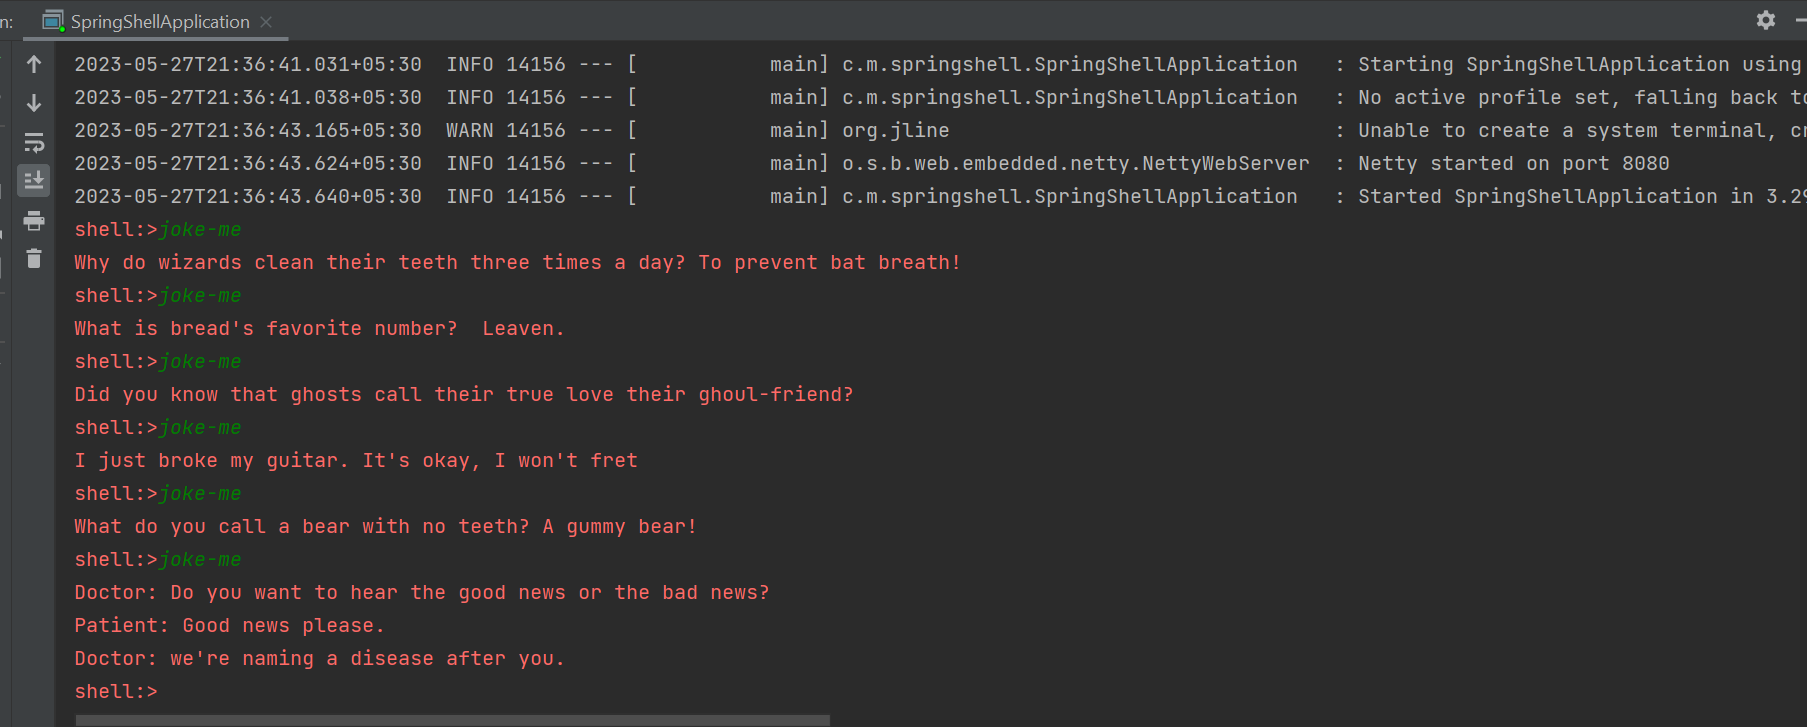
Now, let’s proceed to create a shell application that provides us with a random joke whenever we enter the command “joke-me”. To fetch the jokes, we will utilize an external API as our data source. Once we have developed the shell application, we will proceed to convert it into a native executable using GraalVM, enhancing its performance and deployment capabilities.
Since the code we will be using is self-explanatory, let’s dive right into coding. We’ll work on implementing the necessary components and functionalities for our application. Once we have completed the coding process, we will return with the final version of our application, ready to be tested and utilized.
The https://icanhazdadjoke.com/ API is what we are going to use for fetching the jokes.
All the source code for the application will be available in this repo : GitHub - MaheshBabu11/SpringShell: This is a spring shell demo application
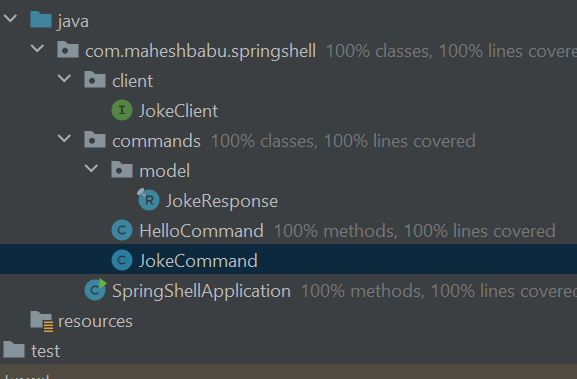
Alright, let’s take a look at the final folder structure that we have accomplished. Below, I will provide the individual code files that we utilized throughout the project :
    package com.maheshbabu.springshell.commands;

    import com.maheshbabu.springshell.client.JokeClient;
    import org.springframework.shell.standard.ShellComponent;
    import org.springframework.shell.standard.ShellMethod;

    @ShellComponent
    public class JokeCommand {

        private final JokeClient jokeClient;

        public JokeCommand(JokeClient jokeClient) {
            this.jokeClient = jokeClient;
        }

        @ShellMethod(key = "joke-me", value = "The command provides you a random joke!")
        public String getRandomJoke() {
            return jokeClient.randomJoke().joke();
        }
    }
    package com.maheshbabu.springshell.commands.model;

    public record JokeResponse( String id, String joke,Integer status) {
    }

    package com.maheshbabu.springshell.client;

    import com.maheshbabu.springshell.commands.model.JokeResponse;
    import org.springframework.web.service.annotation.GetExchange;

    public interface JokeClient {
        @GetExchange("/")
        JokeResponse randomJoke();
    }
    package com.maheshbabu.springshell;

    import com.maheshbabu.springshell.client.JokeClient;
    import org.springframework.boot.SpringApplication;
    import org.springframework.boot.autoconfigure.SpringBootApplication;
    import org.springframework.context.annotation.Bean;
    import org.springframework.web.reactive.function.client.WebClient;
    import org.springframework.web.reactive.function.client.support.WebClientAdapter;
    import org.springframework.web.service.invoker.HttpServiceProxyFactory;

    @SpringBootApplication
    public class SpringShellApplication {

        public static void main(String[] args) {
            SpringApplication.run(SpringShellApplication.class, args);
        }

        @Bean
        JokeClient jokeClient() {
            WebClient client = WebClient.builder()
                    .baseUrl("https://icanhazdadjoke.com")
                    .defaultHeader("Accept", "application/json")
                    .build();
            HttpServiceProxyFactory factory = HttpServiceProxyFactory.builder(WebClientAdapter.forClient(client)).build();
            return factory.createClient(JokeClient.class);
        }
    }
These are the source files that we have used in building the application. Now lets take a look at the final result :
Now, it’s time to convert our shell application into a native executable that can be easily run in your terminal. With the introduction of Spring Boot 3, we can leverage GraalVM for this purpose, and the conversion process is relatively straightforward.
Before creating the native app lets add this in the application.properties file to tidy up a bit.
    logging.level.root = OFF
    spring.main.banner-mode = off;
Now lets go ahead and use the maven wrapper to create the executable :
./mvnw package -Pnative native:complie -DskipTests=true
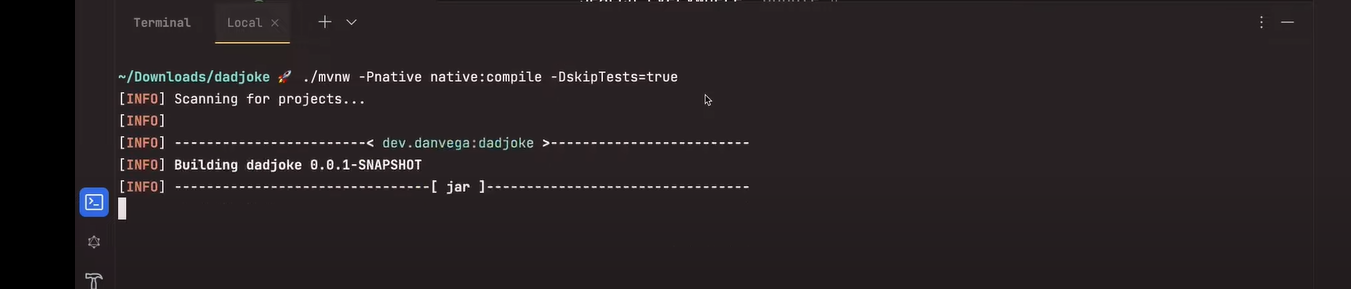
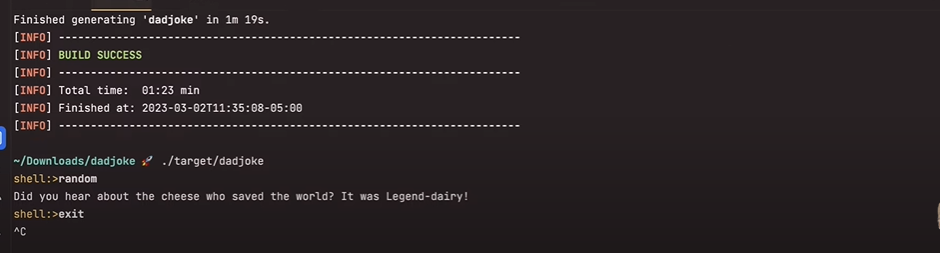
After completing the build process, you can proceed to run the application. When executed, the application will appear in a format similar to the following :
In conclusion, we have explored the process of creating a Spring Shell application from scratch and enhancing it with features such as custom commands, options, and integration with external APIs. We have witnessed the power and flexibility of Spring Shell in developing interactive command-line applications.
Furthermore, we took a step further by converting our Spring Shell application into a native executable using GraalVM. This enabled us to optimize performance and streamline the deployment process, resulting in a more efficient and portable application.
With the knowledge gained from this article, you are now equipped to build your own Spring Shell applications, customize commands, and even transform them into native executables. The possibilities are endless when it comes to developing powerful command-line interfaces for various use cases.
Remember to leverage the rich ecosystem of Spring and explore additional features and extensions available for Spring Shell. Whether you’re building a simple utility tool or a complex CLI application, Spring Shell provides a robust framework to bring your ideas to life.
So, go ahead and start crafting your own interactive command-line experiences with Spring Shell, unleashing the potential of CLI applications in your projects. Happy coding!